UPDATE! He's officially approved!
I have so much fun trooping with my husband. Currently, he has a generic Jedi. I'm often trooping as Leia, and have to remind him that Jedi form no attachments when he tries to give me a kiss during a troop. . . so my long term goal is to finish his ANH Han Solo. Although, I suppose I TECHNICALLY an ANH Luke would work! (That reminds me of a little kid I spoke to at one troop, who had clearly only seen Episode IV, and was convinced that Luke and Leia were a couple. . . )
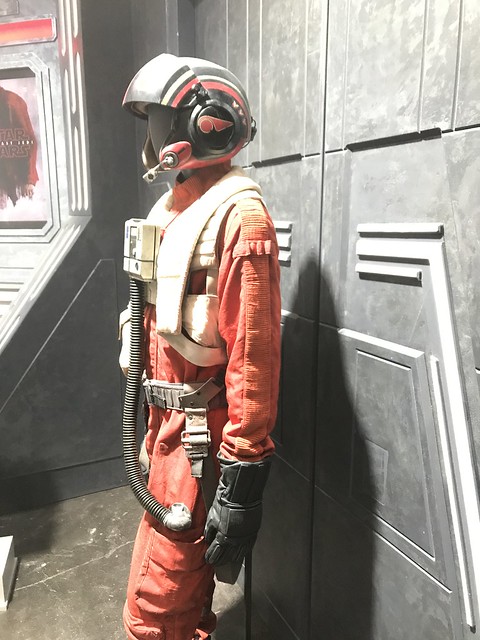
Working on this costume reminded me of why I love the Rebel Legion and Star Wars costuming community! I had posted the link to my album in the Rebel Legion forums, and forgotten about it. A couple of weeks ago, I'd restarted my research on Poe, and found that another member had used my images as reference to make a 3D printed model of the hose connector! When I commented that I was so glad he'd found them useful, and that I was actually working on building my husband's Poe, he sent me a printed piece! Check out the forum here , and thank you again to SSR78/Jeremy Chang!
Below, I've created a draft proposal of this version of Poe based on the TFA generic pilot standards
I have so much fun trooping with my husband. Currently, he has a generic Jedi. I'm often trooping as Leia, and have to remind him that Jedi form no attachments when he tries to give me a kiss during a troop. . . so my long term goal is to finish his ANH Han Solo. Although, I suppose I TECHNICALLY an ANH Luke would work! (That reminds me of a little kid I spoke to at one troop, who had clearly only seen Episode IV, and was convinced that Luke and Leia were a couple. . . )
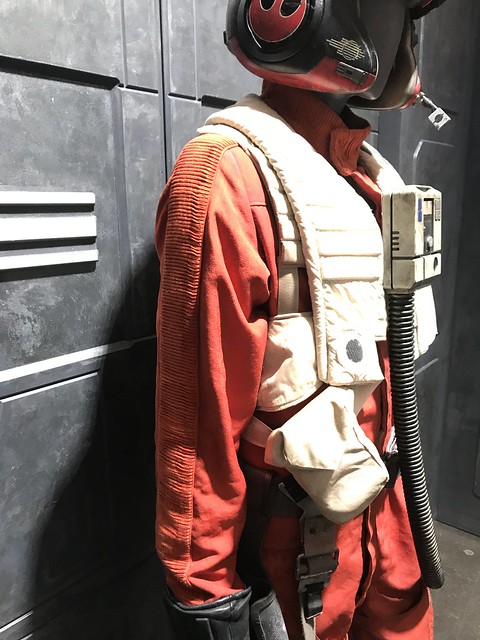
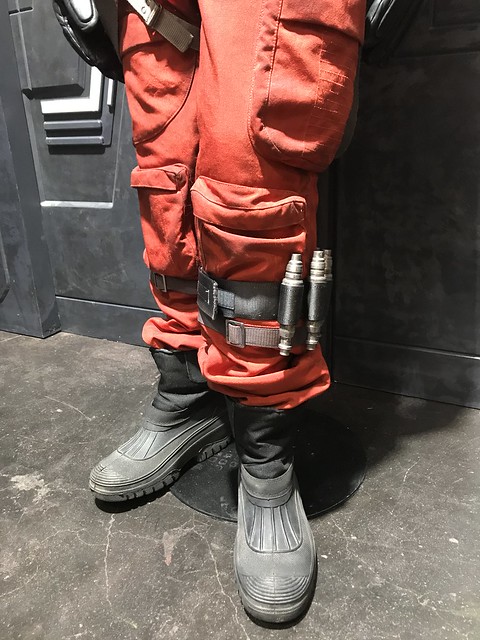
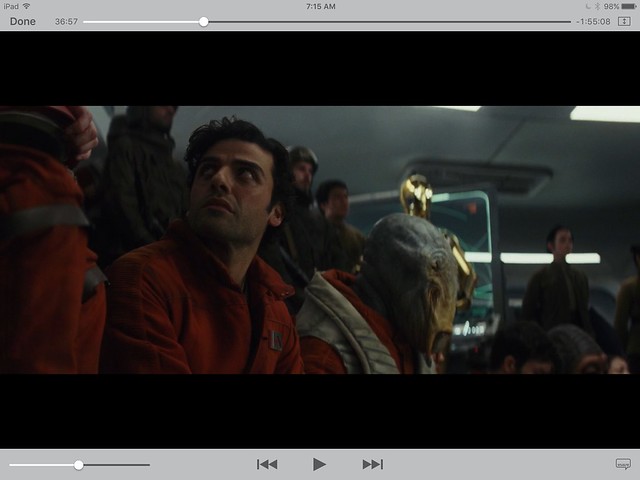
I started research for this costume at New York Comic Con in 2017. I took TONS of photos of the screen-used Poe Dameron costume on display.

Here are some other REALLY helpful resources: http://www.forum.rebellegion.com/forum/viewtopic.php?t=89849
Ejection harness: https://www.etsy.com/listing/575343759/tfa-resistance-pilot-ejection-harness?ref=shop_home_active_2
Rank badge, blaster, leg flares: https://maz3d.com/product/resistance-rank-badge/
Working on this costume reminded me of why I love the Rebel Legion and Star Wars costuming community! I had posted the link to my album in the Rebel Legion forums, and forgotten about it. A couple of weeks ago, I'd restarted my research on Poe, and found that another member had used my images as reference to make a 3D printed model of the hose connector! When I commented that I was so glad he'd found them useful, and that I was actually working on building my husband's Poe, he sent me a printed piece! Check out the forum here , and thank you again to SSR78/Jeremy Chang!
Below, I've created a draft proposal of this version of Poe based on the TFA generic pilot standards
1. Flightsuit:
• Red/dark orange, one-piece jumpsuit in screen accurate color and material. (PLEASE NOTE: neither Original Trilogy Rebel pilot orange nor B-Wing pilot red are acceptable for approval as there is a noticeable difference between both of them and the correct TFA Pilot color.)
• With a stand-up style collar tightly pleated detailing all the way around the outside. Pleated material should be the same as, or slightly lighter than, the flight suit. Collar closes at front, left over right, but is worn open, showing four rectangular trouser hooks inside the left edge of the collar.
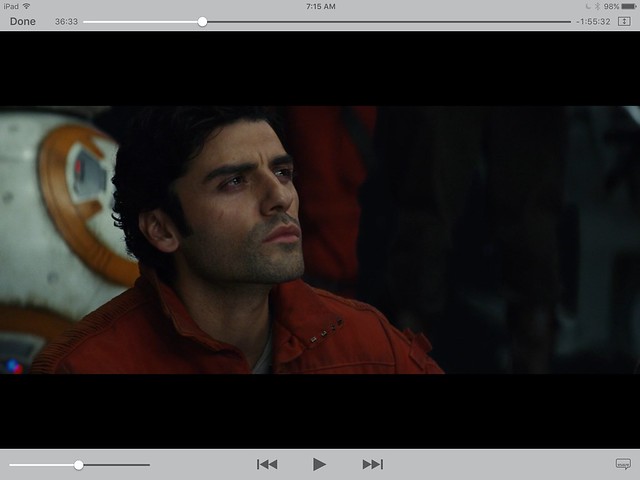

• Pleated trim details (matching the collar pleated detailing) run down the outside of the arms and down to the cuff at the wrist.
• Thin “pen holder” pocket built into the jumpsuit on the upper left arm below the left shoulder seam with 3 small (pen-sized) loops in the middle.
• No visible waistband (not to be confused with waist seam), zippers or snaps on the jumpsuit. Zipper up front of the suit should be covered by a placket. The zipper should not be visible when the top portion of the flightsuit is unzipped to just below the level of the rank badge.

• Small tab along the placket just below the collar serving as an attachment point for the chest box. The chest box has a clip on the back (similar to a slide belt clip) to secure it to the tab.
• The jumpsuit legs have an outer “chap” layer on all sides of the legs. The chaps can be sewn down around the knees, top of the hip, and into the inseam of the legs.
•
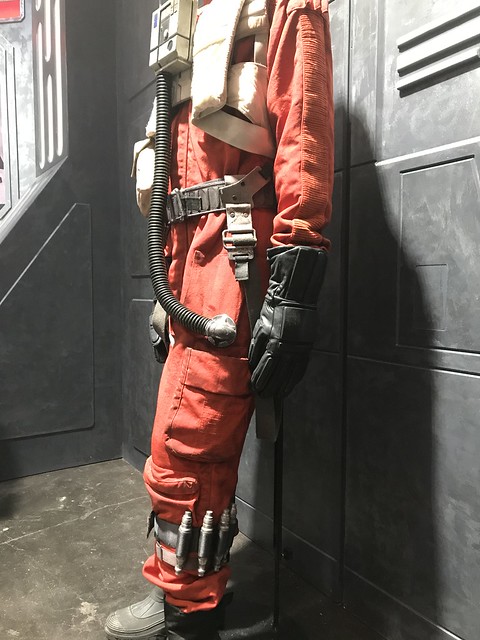
I originally thought the command room version should have the Silver hose connector slightly overlaps the top left of the highest left chap pocket,
•

I originally thought the command room version should have the Silver hose connector slightly overlaps the top left of the highest left chap pocket,
HOWEVER, the hose connector SHOULD be visible in profile here, but it is not, so IMO this should be an optional item for this configuration, or not needed. It does make me wonder if there is some sort of hole under the connection in TLJ... but I haven't found any images of that...
• Pockets match screen reference images
– A top right thigh cargo style pocket with flap closure, and with a secondary flat pocket with flap closure that wraps around the front of the leg.
– A smaller second rectangular cargo style pocket with rounded edges located on the right leg, with a flap top and is sewn into the front knee. – A top left thigh rectangular cargo style pocket with open top square faux top flap, with small strip detail running vertically down the base of the pocket, layered over a tall, narrow open-topped pocket. – A smaller second rectangular cargo style pocket with rounded edges is located on the left leg, with a flat flap top and is sewn into the front knee.
• A strap of dark grey webbing runs around the leg just below the lower pocket on each leg. The strap is sewn in place on the pant leg. The strap features a sliver/light-grey slide-adjuster buckle located on the front side of the leg.
• Flight suit should have a strap of dark grey webbing running across the width of the lower back with a black adjustable quick-release buckle.
• The flight suit legs should extend to the ankle or top of foot. Bottoms of legs should have either a small cuffed edge folded and sewn under or bloused under.
• Sleeves end in dark grey knit ribbed cuffs. The cuffs are attached to the inside of the sleeve.
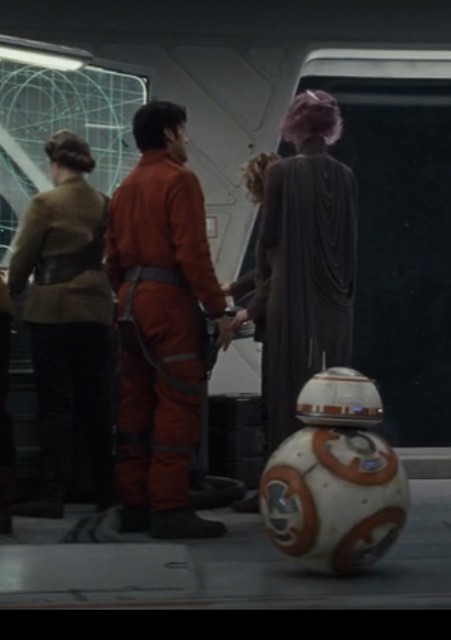 2. Commander Rank badge matching screen images
 2. Commander Rank badge matching screen images
3. Flight harness:
• The belt is medium/dark grey in color with ribs, has a border at the top and bottom edges, and a roll-pin buckle in the front. (Please note that the rest of the flight harness should be slightly darker than the belt.)
• 2 L-shaped silver/light-grey aluminum paddle brackets (flat or bent/angled) hang from the top of the ejection strapping which loops around the belt.
• Strapping includes two roll-pin buckles on the front right and left attached to the paddles by straps and fastened with silver/light-grey rivets/Chicago screws.
• There are small black pull-tabs attached to the bottom of the 2 roll-pin buckles on the harness, the 2 L-shaped silver/light-grey aluminum paddle brackets, and the roll pin buckle. (optional - the stitching on the tabs is gray)
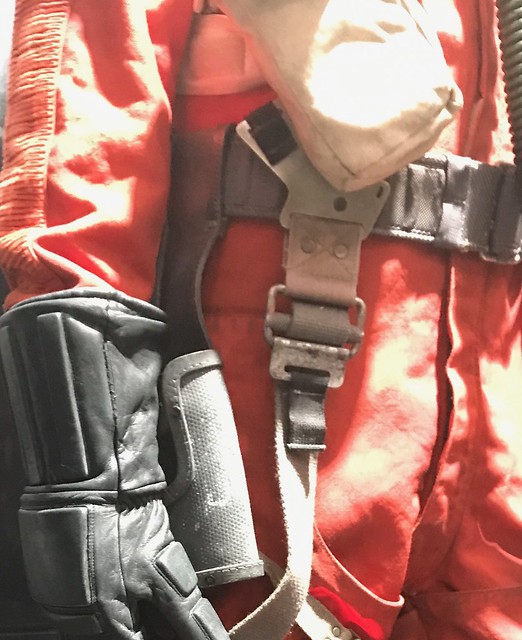

• The back of the belt has an additional strap which hangs down from the back center of the belt to below the crotch and connects to the ejection leg straps on the backside of the legs.
4. Signal flares & leg bandolier:
• Grey webbing bandolier around the left leg just at the bottom of the knee pocket with 4 accurate silver/light-grey flares attached with loops.
5. Boots: Very dark grey/black rubber boots with screen accurate surface and tread details.
The boots are only visible from the ankle down on screen due to the suit legs being worn outside the boot so uppers may vary.
6. Holster: Screen accurate dark-grey shaped holster affixed to the belt via dark grey/black leather or leather-like material, with accurately modeled and colored Glie-44 Erliss Ryloth Defense Tech Pistol (pistol optional in locations where prohibited by local laws).
6. White/beige round collar undershirt (no v-neck)
6. White/beige round collar undershirt (no v-neck)
OPTIONAL ITEMS FOR THIS CONFIGURATION (I haven't exahustively updated these for TLJ Poe)
*If items 2,3,4 are present, all three should be present*
*If items 2,3,4 are present, all three should be present*
1. Helmet:
•Accurately styled helmet with all hard details (visor, mic, dataport on back lower edge, recessed forehead stripe, ear cups, etc.)
•Accurately styled helmet with all hard details (visor, mic, dataport on back lower edge, recessed forehead stripe, ear cups, etc.)
•Appropriate paint scheme (if it doesn’t look like it would fit on screen strafing Stormtroopers or Starkiller Base, then don’t use it!)
2. Flight vest:
• White/off-white vest consisting of three parts: an outer/collar vest that wraps around the neck and extends down to the lower torso, an inner/under vest that connects to the back panel, and the back panel.
• Screen accurately designed outer/ collar vest, with 2 horizontal quilted/padded bar sections running the width of the vest panel approximately mid-torso on the left, and 7 horizontal quilted/padded bar sections starting at the shoulder blade on the right panel.
• On the left panel of the outer vest there is a black/dark-grey distressed rebel bird at collarbone height, and “pull to inflate” is written in inverted Aurebesh equivalent of English immediately above the 2 quilted/padded sections.
• At the bottom of the right front panel of the outer vest there is a black circle.
• The outer vest should have a rolled/quilted/corded edge around the outside edge.
• The outer vest should be padded to give it proper body and should extend no further than the width of the shoulder. The collar (also padded) should wrap around the neck (like a life vest/preserver). The outer vest edge should angle slightly so that it’s wider at the shoulder than at the lower edge.
• Screen accurate designed inner/under vest with bottom edge section strap attached to the underside collar portion of the vest, wrapping around the sides of the costumer and continuing across the inside of the bottom of the back panel. At the center of the lower back, there is a rectangle detail with a large rectangular stitched X.
• Clasps attached with Velcro sewn to the vest, made of a hard material with appropriate grey detailing should be affixed to both sides of the vest gap and affixed to the chest box.
• Screen accurate designed back panel with quilted/padded bar sections and scooped styled arm holes.
3. Screen accurate vest cargo pocket/pouch.
3. Screen accurate vest cargo pocket/pouch.
3. Chest box:
• Off-white/pale-gray chest box with black recesses and beveled edges, screen accurate LED, disk, and button details.
• A black corrugated rubber/plastic hose connects to the bottom right of the plate along the bottom of the chest box and slopes down across the front of the body to terminate in the hose connector
• Screen-accurate silver hose connector slightly overlaps the top left of the highest left chap pocket
• Screen-accurate silver hose connector slightly overlaps the top left of the highest left chap pocket
4. Gauntlets:
• Black padded leather or leather-like material with a mid-length gauntlet cuff.
• Screen accurate 3 raised padded strips on the gauntlet cuff facing the outside, padded strip on each finger, pad on the top of the hand, padded strip over the knuckles, and either a single pad or two part pad on the thumb.


