

Jen Eyre Cosplay
Monday, August 21, 2017
Saturday, August 19, 2017
Resources - Princess Leia Yavin Ceremonial Gown
I found this wonderful post: http://thelavenderstudio.blogspot.com/2011/01/ceremonial-leia-dress.html after I finished mine, but the tips on the wings/overlays would have been really useful! I ended up making my overlay of all one piece, but actually could have used two. For approval, I had to add a bit to the back edges of the wings, where they fell along the back of my arms. If you compare the shape of her wing picture to my pattern, I think you can see where I would have needed to add more fabric if you look at the "This section will go over your shoulder edge" area.
As usual, refer to the rebel legion standards:
http://www.forum.rebellegion.com/forum/viewtopic.php?t=8853
 |
| By Gerry Francisco |


Ceremonial Leia pictures at DragonCon 2016 by Gerry Francisco
I was so fortunate that Gerry Francisco took these awesome pictures of me after the big Star Wars group photo at the 2016 DragonCon!
Check him out: https://gcf-photography.smugmug.com/


Thursday, August 3, 2017
Forewarned is ForeArmed
The forearm pieces seemed absolutely HUGE compared to my forearms. I was worried that I'd need to form new return edges, and do all kind of ridiculous things to make them fit. I was not looking forward to that.
The forearm cover strips are supposed to be 15mm, so I cut strips of painter's tape at 7mm. Yeah, I got rid of half a mm. I live dangerously. Actually, half of me thought cutting out a mm (1/2 on each side) was going to help the fit. The other half thought I would end up accidentally adding in that half a milimeter anyway. We shall see!


One section doesn't have a return edge. I only have two hands, so I couldn't take pictures of this in the process! I taped the side with two return edges, and the wrapped it around my arm. I lined up the section opposite the no return edge bit (the far left and far right parts in the picture below) I made marks where I wanted the edges to meet. I was able to reach inside and mark a line by tracing along the other edge. It actually seemed like there was a hint of a line from the mold there, too!


After trimming, I think they're still fairly symmetrical.


The forearm cover strips are supposed to be 15mm, so I cut strips of painter's tape at 7mm. Yeah, I got rid of half a mm. I live dangerously. Actually, half of me thought cutting out a mm (1/2 on each side) was going to help the fit. The other half thought I would end up accidentally adding in that half a milimeter anyway. We shall see!

I put the strip along the edge of the forearm, so I had a tape line exactly 7 or 7.5mm away. Probably should have gotten a picture of that. Maybe I'll remember on the right side!

One section doesn't have a return edge. I only have two hands, so I couldn't take pictures of this in the process! I taped the side with two return edges, and the wrapped it around my arm. I lined up the section opposite the no return edge bit (the far left and far right parts in the picture below) I made marks where I wanted the edges to meet. I was able to reach inside and mark a line by tracing along the other edge. It actually seemed like there was a hint of a line from the mold there, too!


After trimming, I think they're still fairly symmetrical.


It was raining, so I couldn't go outside to start gluing with the E6000. Also, moving on to the gluing stage is scary.
Correct Helmet Ear Screws

Here's the left ear before I put the correct screws BACK in. You can see that the countersink was too big, as it was made for a larger screw. Fortunately, the larger screw was actually correct for centurion level! Check out the bottom screw. . .

The hole for the bottom screw, due to the countersink, was large enough that I was worried about gapping or pulling through. Below, you can see my little work around.

Basically, I made a little piece, almost a washer, that fit inside the hole. This took a while, and turned out to be unnecessary!


Oh! Another problem I ran into was that some of the ear screw holes were too close to the washers of the rivets to use a washer with the screw and nut. Well, the washer couldn't lay flat. So, I actually trimmed some washers so the nuts could be flat! That also helped the screws to lie better on the surface.
Tuesday, August 1, 2017
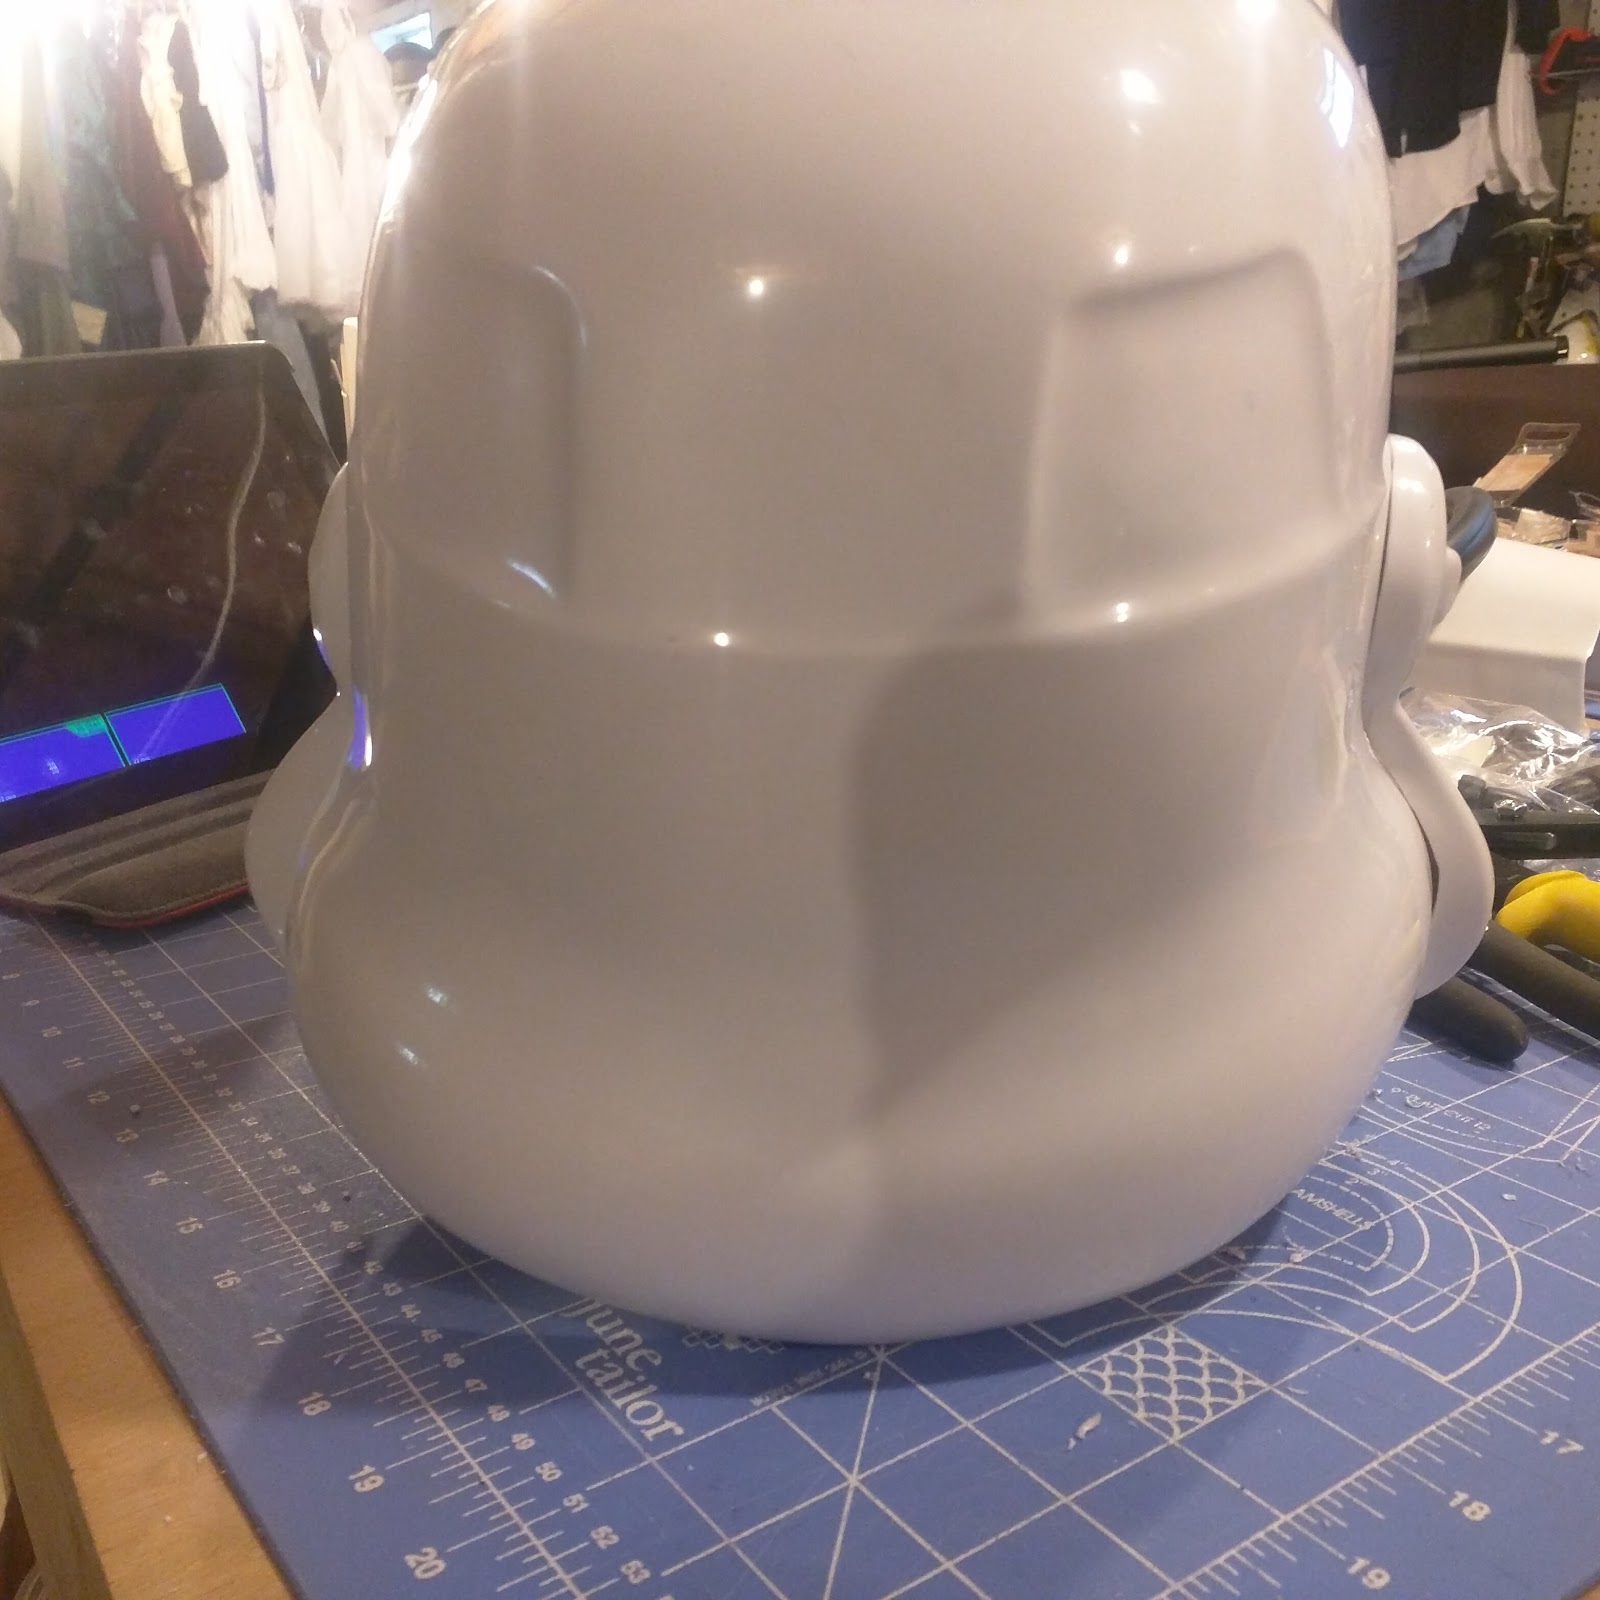
Stormtrooper Helmet Assembly
This is NOT going to be a detailed "how to" thread. I've linked below to the video tutorial I recommend. I will share my progress, and my entertaining mistakes. If I come up with any tips, I'll probably share them too. That's a big IF for this project!

I learned from Walt that ventilation through the teeth is critical. He mentioned putting fans behind the teeth, to blow out hot air from your breath. Definitely going to try that! Hoping my microphone won't pick up on the fan noise. If it does, I'll probably try to finagle a switch to turn that fan off alongside a switch to turn on my microphone. Maybe.


****CORRECTION!!!!!!!!!!! Apparently I was using the right screws for centurion the first time!!!!
That's what I get for not reading the forums enough. And not labeling all the parts. I'll put the correct screws back in tomorrow.*****

Everyone says that the ears are the hardest part. Well, I'm hoping that's true! If it is, I'm sure glad I got them out of the way. It's pretty rare, with a costuming project, that I don't meet my own quality standards. With the ears, I just have to step back and tell myself, "ear gaps are canon. . . ear gaps are canon. .." If you're anything like me, and those ear gaps are bothering you, do yourself a favor, and scroll through this awesome helmet reference. Type A friends, are you able to breath again? No? Me either. You want to exactly match the gaps on the "move along" helmet, now, don't you? STOP!!!!! You're not even done with the helmet yet!!!! MOVE ALONG TO THE NEXT PART!!!

And I need to keep reminding myself that one ear higher than the other is also canon. . . .
Oh, wait. Before you do anything, meet the best YouTube video series ever. TK 1636's armor building tutorial on YouTube has been playing on repeat while I work. He's building for Centurion Level approval, which is my goal. Centurion is an optional, advanced approval level for the 501st. Just watch this over and over again. Seriously. He is AMAZING.